About my work. Building indigo ~ Indigo dyeing
“Indigo Textile Art Work”
My indigo dyed textiles are made by way of a dyeing technique referred to as “Itajime Shibori” using a board in the limited space of a circular indigo vat. With a straight board, it creates the sharpness of the design by folding or bending fabric while expressing the flexibility of the material through curved lines.
“Itajime Shibori”
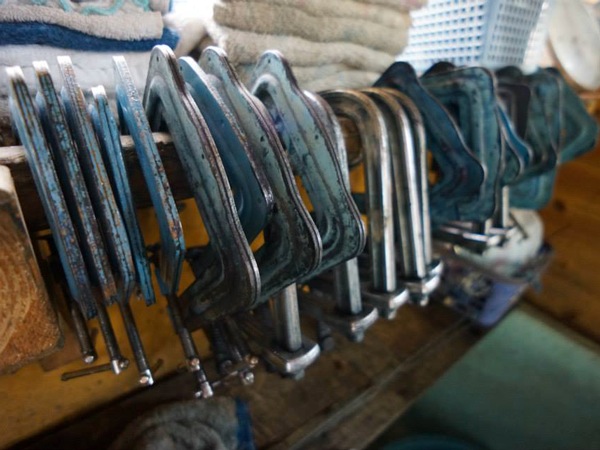
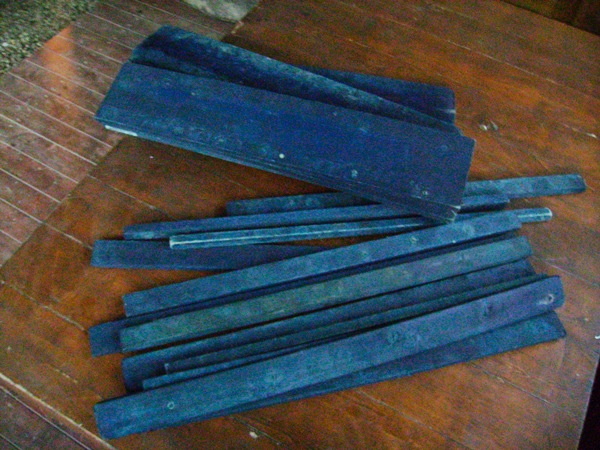
“Itajime Shibori” is a fabric dying method that prevents parts of the fabric from absorbing the dye through applied pressure on a board with the use of a C-clamp. The wood used in this method does not require a particular type of wood, but has to be natural full-grain wood that is robust to withstand the strength of the C-clamp. The shape of wood can be a simple board or a stick. With the same shape of board / stick, unlimited patterns of design emerge depending on how the fabric is folded. I try to put a twist on this by how the fabric is folded and the size of wood used because the dyeing takes place in the restricted space of the indigo vat. It is a very difficult task to leave some parts of the fabric white while soaking the fabric in the vat. To dye fabric, put it into the indigo vat for several minutes, and then take it out to expose it to the air. The swift handling of fabric while it is being exposed to the air can avoid the occurrence of color unevenness. Letting the fabric sit longer in the vat does not help it dye darker because only light colors of indigo are transferred to the fabric in one dipping. I repeat the process until it gradually turns dark, which creates the contrast of colors.
I create a design in my mind as I fold the fabric. Only one design pattern appears on the folded fabric at a time, so I often unfasten a C-clamp to change an area of fabric to be pressed with the tool, or unfold fabric and fold it again in a slightly or totally different way. I cycle through the dyeing process in order to reach the final product. The colors of indigo look exquisite when the contrast of colors arises by means of non-dyed fabric and the number of dyeing times in the process. In this way I depict a variety of designs in the dyed textile. My design ideas and inspiration come from the size capacity of the indigo vat. More specifically, when I dip fabric with a C-clamp and board attached into a vat, I turn the board vertically or sideways so that they can fit into it. The range of fabric dyeing is determined by the diameter and depth of the indigo vat. I believe that if a dyed textile does not surpass the capacity of the vat, it will always have potential to be the best art work.
The blue color that comes from the plant fibers is beautiful. The lighter color is similar to the color of the sky in the middle of summer.
I set the sky blue color as my base color to “build indigo”.
“Sukumo”
In Japan, indigo dye is made from the indigo plant, Persicaria tinctoria, and the raw ingredient made from the plant is called “Sukumo”. To make the dye, it starts with drying the leaves of the plant. Stack up the dried leaves and apply water to them every several days. The temperature of the leaves is adjusted as deemed appropriate in a mixing process referred to as “Kirikaeshi”. After about 100 days of fermentation time, the mixture becomes compost, and this is the dye, “Sukumo”. This is a difficult job conducted by an indigo master who controls and adjusts the fermentation of Sukumo. After water is thrown onto the stack of dried leaves, the fermenting process progresses. In the meantime, the indigo master has to watch for the temperatures of the mixture that vary by the injected water volume. In Japan, it is a common practice that indigo farmers make Sukumo and dyeing artists purchase it to create their indigo dyed textiles. It is a division of labor.
“Building Indigo”
The coloring substance of indigo in Sukumo is insoluble in water and cannot be used for dyeing as it is. With the method of fermentation, the indigo will change to a soluble form. In an indigo vat that is buried in the soil, mix together wood ash lye with a high content of alkali, Sukumo, nutrients such as Fusuma or bran and let them ferment for a week to reduce indigo in Sukumo to a soluble form in water. This process is called “building indigo”.
“Wood Ash Lye”
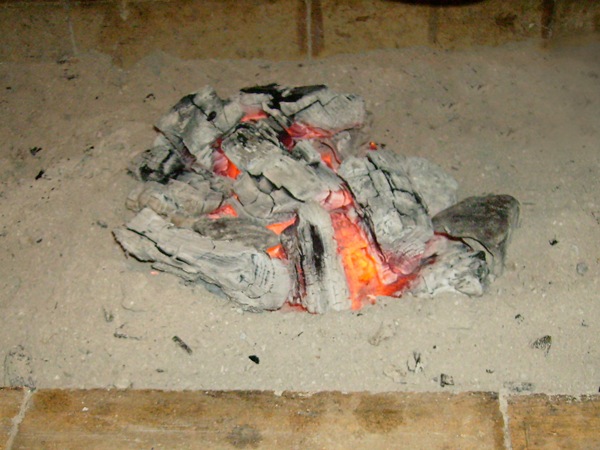
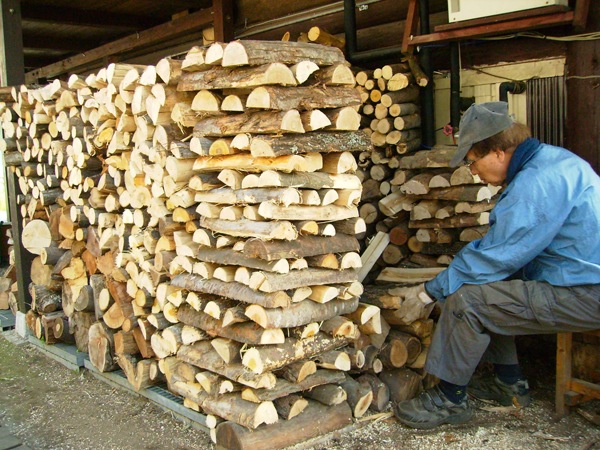
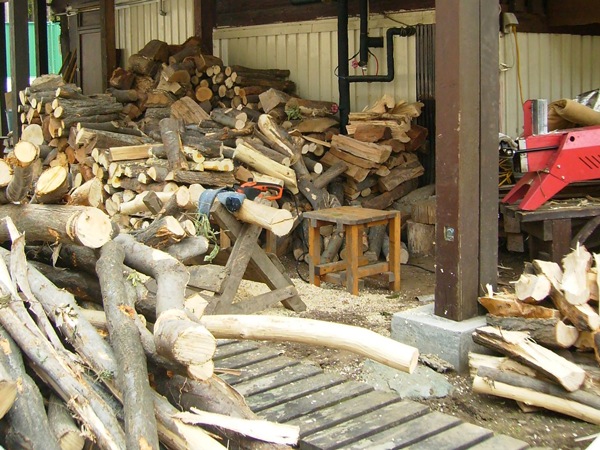
The fire wood that is used in the form of wood ash lye for building indigo has long been supplied to my studio by a kind fire wood specialist. I appreciate the supply that allows me to steadily make wood ash lye. The fire wood needs to be dried before its use otherwise it does not burn well, which means the wood for the coming winter has to be prepared in advance during spring time. Thanks to the support from my family members with the preparation for winter including cutting wood, I can continue my indigo work. The cut fire wood is also used in my daily life for cooking and heating our house. I use Oki, hot charcoal deep inside with thin layers of white ash on the surface, to keep the indigo vats warm. For building indigo, I use the wood ash that is from leftover fire wood after having served its purpose.
“Maintaining and Managing Indigo”
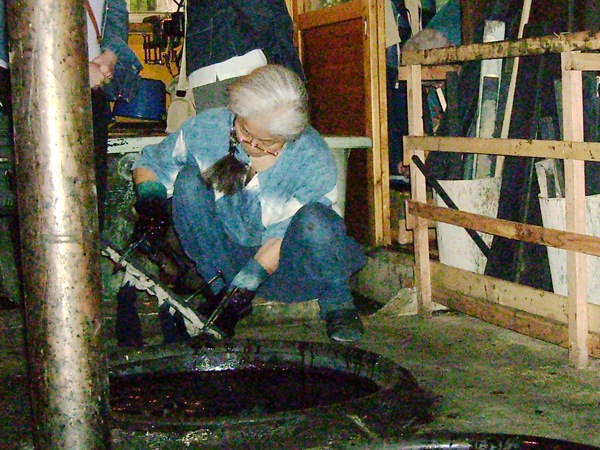
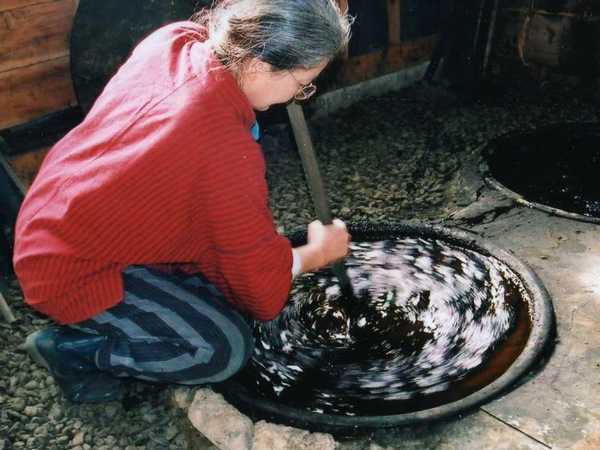
Alkali sinks to the bottom of a vat over the course of time. To keep the alkaline level inside in stable condition, I always churn it once a day. At this time, I check the conditions of fermentation. I smell the indigo, look at indigo flowers (indigo foam), and listen for a sound while churning it. If indigo flowers are raised and puffy, it means that they are in good condition. If the sound of the churning stick makes a high-pitch clattering noise when it comes into contact with the vat, I think of it as a sign that the alkaline is in a stable condition with a high content. When there is a muffled sound, I consider it as having lower levels of alkaline. I do this routine task on a daily basis to determine whether the indigo needs alkaline that day, or wants to be warmed up, or needs more nutrients. Lastly, I take a lick of the liquid to check its alkaline level. I always try to keep it at around pH 11 because bacterial activities in indigo slow down with pH 12 or higher while the growth of other unwanted bacteria increases with pH 10 or lower.
“I see our daily lives through the process of building indigo.”
The temperature that is the best suited for the bacterial activities in indigo is around 30°C (86°F), but dyeing fabric takes place when the temperature in an indigo vat is between 20°C ~ 26 or 27°C (68°F ~ 78.8 or 80.6°F). When prompting the fermenting process, I raise the temperature a little higher, but under the conditions of continuous high temperatures or when it gets too cold, the indigo will not generate good colors. I find it very similar to the comfortable temperatures we feel in our daily lives. Overuse of indigo dye could result in sending too much oxygen into the vat. Consequently, indigo dye becomes oxidized and the reduction process of indigo slows down, which means that the color absorption into fabric deteriorates and ends up with unattractive colors. I believe that this is advice from the indigo dye saying, “You need to take a break.” Conversely, when indigo is underused, it would still not generate colors easily. This is a message telling, “You might want to start working hard again.” In general, overuse of indigo dye would generate less color than when compared to underuse of the dye. (I thought that bacteria in indigo did not like oxygen, but they actually want it every once in a while.) I think indigo dye gives me lessons on how to work in harmony with the flow of nature. There is only a little amount of coloring substance contained in an indigo leaf. When the color of the indigo liquid in a vat gets lighter and used up in the dyeing cycles, it will then be returned to the soil.
“Building indigo” is a part of my life. My daily life synchronizes with the microorganisms that live through the fermenting process of indigo.
My indigo dyed textiles are made by way of a dyeing technique referred to as “Itajime Shibori” using a board in the limited space of a circular indigo vat. With a straight board, it creates the sharpness of the design by folding or bending fabric while expressing the flexibility of the material through curved lines.
“Itajime Shibori”
“Itajime Shibori” is a fabric dying method that prevents parts of the fabric from absorbing the dye through applied pressure on a board with the use of a C-clamp. The wood used in this method does not require a particular type of wood, but has to be natural full-grain wood that is robust to withstand the strength of the C-clamp. The shape of wood can be a simple board or a stick. With the same shape of board / stick, unlimited patterns of design emerge depending on how the fabric is folded. I try to put a twist on this by how the fabric is folded and the size of wood used because the dyeing takes place in the restricted space of the indigo vat. It is a very difficult task to leave some parts of the fabric white while soaking the fabric in the vat. To dye fabric, put it into the indigo vat for several minutes, and then take it out to expose it to the air. The swift handling of fabric while it is being exposed to the air can avoid the occurrence of color unevenness. Letting the fabric sit longer in the vat does not help it dye darker because only light colors of indigo are transferred to the fabric in one dipping. I repeat the process until it gradually turns dark, which creates the contrast of colors.
I create a design in my mind as I fold the fabric. Only one design pattern appears on the folded fabric at a time, so I often unfasten a C-clamp to change an area of fabric to be pressed with the tool, or unfold fabric and fold it again in a slightly or totally different way. I cycle through the dyeing process in order to reach the final product. The colors of indigo look exquisite when the contrast of colors arises by means of non-dyed fabric and the number of dyeing times in the process. In this way I depict a variety of designs in the dyed textile. My design ideas and inspiration come from the size capacity of the indigo vat. More specifically, when I dip fabric with a C-clamp and board attached into a vat, I turn the board vertically or sideways so that they can fit into it. The range of fabric dyeing is determined by the diameter and depth of the indigo vat. I believe that if a dyed textile does not surpass the capacity of the vat, it will always have potential to be the best art work.
The blue color that comes from the plant fibers is beautiful. The lighter color is similar to the color of the sky in the middle of summer.
I set the sky blue color as my base color to “build indigo”.
“Sukumo”
In Japan, indigo dye is made from the indigo plant, Persicaria tinctoria, and the raw ingredient made from the plant is called “Sukumo”. To make the dye, it starts with drying the leaves of the plant. Stack up the dried leaves and apply water to them every several days. The temperature of the leaves is adjusted as deemed appropriate in a mixing process referred to as “Kirikaeshi”. After about 100 days of fermentation time, the mixture becomes compost, and this is the dye, “Sukumo”. This is a difficult job conducted by an indigo master who controls and adjusts the fermentation of Sukumo. After water is thrown onto the stack of dried leaves, the fermenting process progresses. In the meantime, the indigo master has to watch for the temperatures of the mixture that vary by the injected water volume. In Japan, it is a common practice that indigo farmers make Sukumo and dyeing artists purchase it to create their indigo dyed textiles. It is a division of labor.
“Building Indigo”
The coloring substance of indigo in Sukumo is insoluble in water and cannot be used for dyeing as it is. With the method of fermentation, the indigo will change to a soluble form. In an indigo vat that is buried in the soil, mix together wood ash lye with a high content of alkali, Sukumo, nutrients such as Fusuma or bran and let them ferment for a week to reduce indigo in Sukumo to a soluble form in water. This process is called “building indigo”.
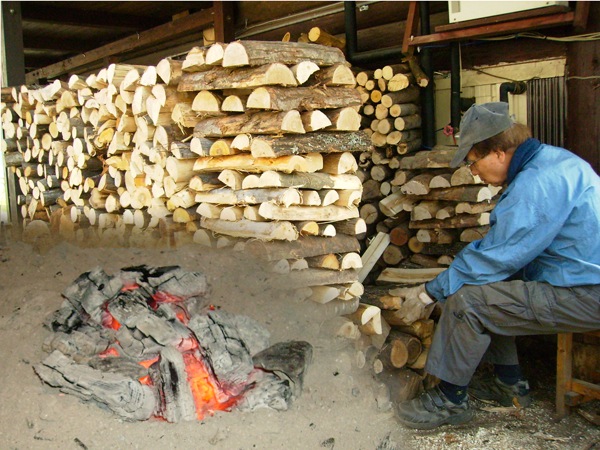
“Wood Ash Lye”
The fire wood that is used in the form of wood ash lye for building indigo has long been supplied to my studio by a kind fire wood specialist. I appreciate the supply that allows me to steadily make wood ash lye. The fire wood needs to be dried before its use otherwise it does not burn well, which means the wood for the coming winter has to be prepared in advance during spring time. Thanks to the support from my family members with the preparation for winter including cutting wood, I can continue my indigo work. The cut fire wood is also used in my daily life for cooking and heating our house. I use Oki, hot charcoal deep inside with thin layers of white ash on the surface, to keep the indigo vats warm. For building indigo, I use the wood ash that is from leftover fire wood after having served its purpose.
“Maintaining and Managing Indigo”
Alkali sinks to the bottom of a vat over the course of time. To keep the alkaline level inside in stable condition, I always churn it once a day. At this time, I check the conditions of fermentation. I smell the indigo, look at indigo flowers (indigo foam), and listen for a sound while churning it. If indigo flowers are raised and puffy, it means that they are in good condition. If the sound of the churning stick makes a high-pitch clattering noise when it comes into contact with the vat, I think of it as a sign that the alkaline is in a stable condition with a high content. When there is a muffled sound, I consider it as having lower levels of alkaline. I do this routine task on a daily basis to determine whether the indigo needs alkaline that day, or wants to be warmed up, or needs more nutrients. Lastly, I take a lick of the liquid to check its alkaline level. I always try to keep it at around pH 11 because bacterial activities in indigo slow down with pH 12 or higher while the growth of other unwanted bacteria increases with pH 10 or lower.
“I see our daily lives through the process of building indigo.”
The temperature that is the best suited for the bacterial activities in indigo is around 30°C (86°F), but dyeing fabric takes place when the temperature in an indigo vat is between 20°C ~ 26 or 27°C (68°F ~ 78.8 or 80.6°F). When prompting the fermenting process, I raise the temperature a little higher, but under the conditions of continuous high temperatures or when it gets too cold, the indigo will not generate good colors. I find it very similar to the comfortable temperatures we feel in our daily lives. Overuse of indigo dye could result in sending too much oxygen into the vat. Consequently, indigo dye becomes oxidized and the reduction process of indigo slows down, which means that the color absorption into fabric deteriorates and ends up with unattractive colors. I believe that this is advice from the indigo dye saying, “You need to take a break.” Conversely, when indigo is underused, it would still not generate colors easily. This is a message telling, “You might want to start working hard again.” In general, overuse of indigo dye would generate less color than when compared to underuse of the dye. (I thought that bacteria in indigo did not like oxygen, but they actually want it every once in a while.) I think indigo dye gives me lessons on how to work in harmony with the flow of nature. There is only a little amount of coloring substance contained in an indigo leaf. When the color of the indigo liquid in a vat gets lighter and used up in the dyeing cycles, it will then be returned to the soil.
“Building indigo” is a part of my life. My daily life synchronizes with the microorganisms that live through the fermenting process of indigo.

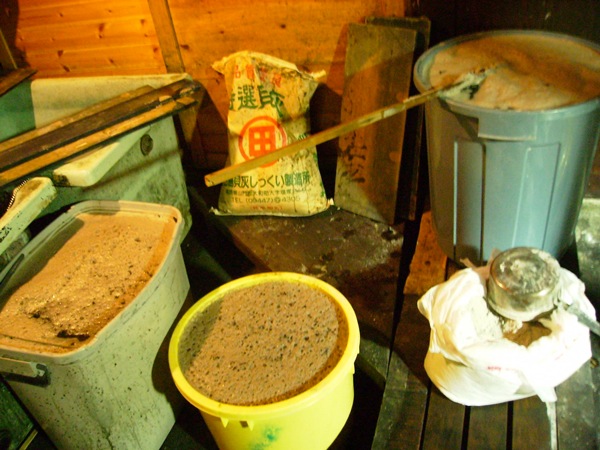
The preparation of building indigo
I use Japanese traditional Sukumo that has continued since Edo era, and made by the company, Awa Indigo Nii Seiaijo.
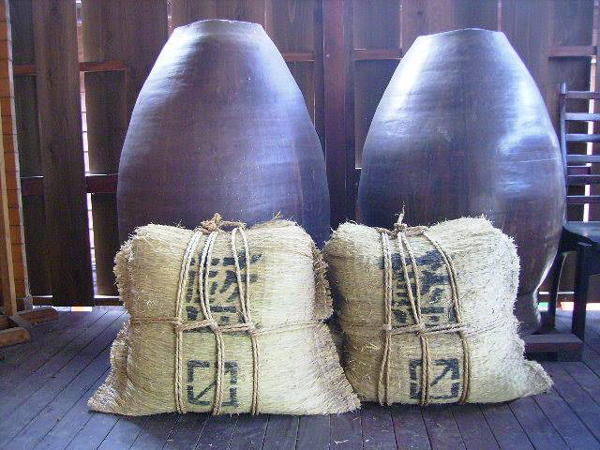 Indigo Vats and Japanese traditional Sukumo.
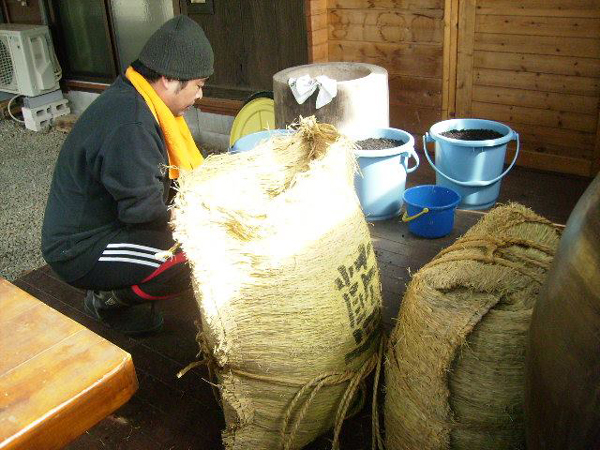
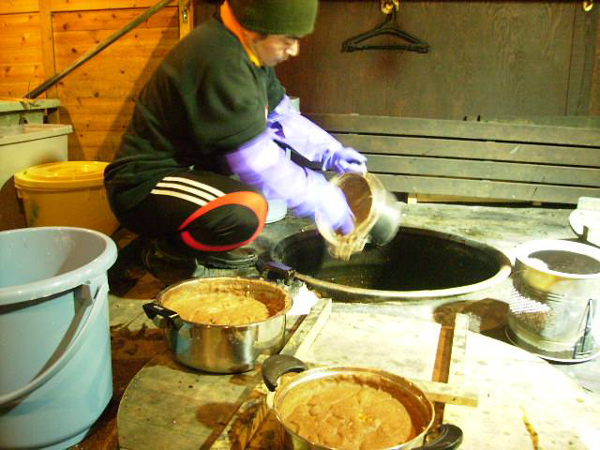
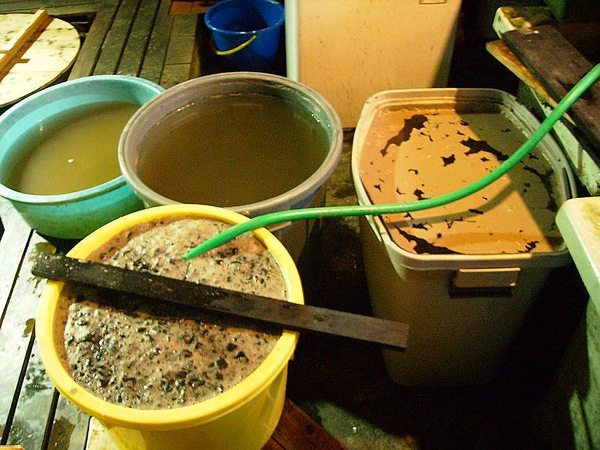
 Making wood ash lye
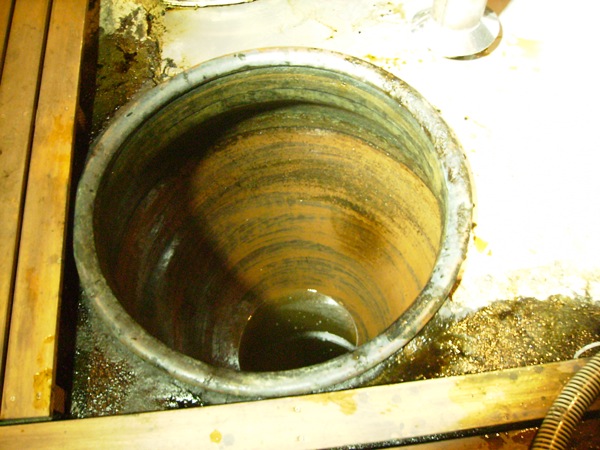
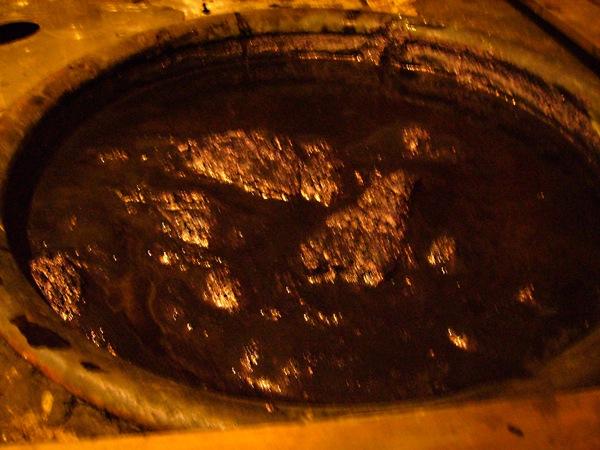
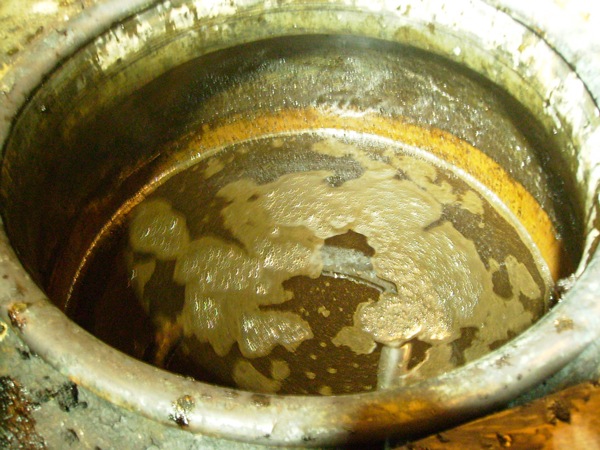 The indigo vat right after Sukumo and wood ash lye were added
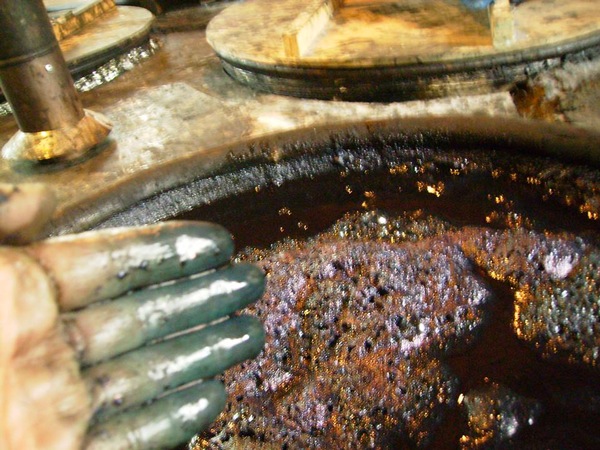
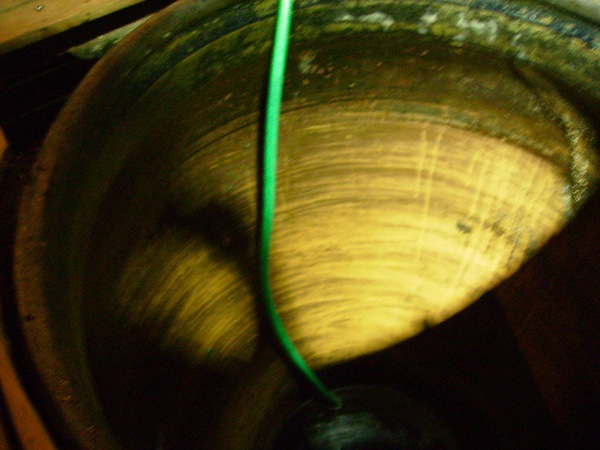
 The indigo vat when the fermentation started
on the second day of the preparation
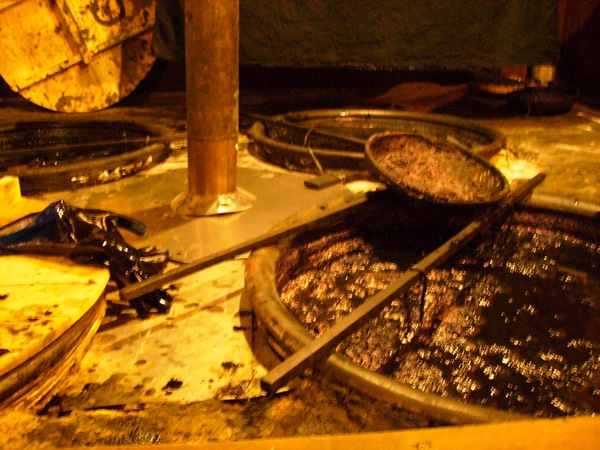
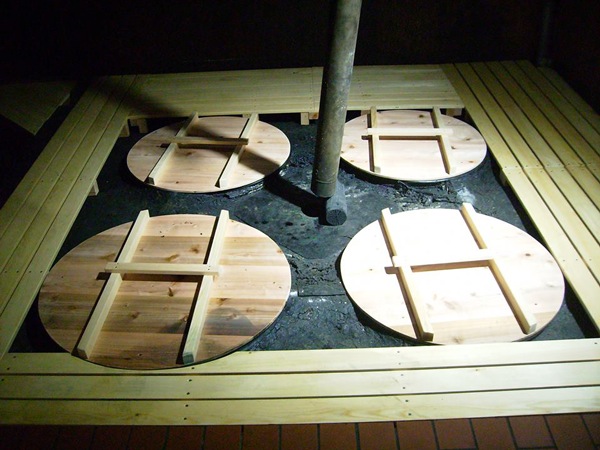
Newly renovated fire bed and the surrounding indigo vats
“Fire bed”
Since olden days, four indigo vats have been buried in the soil with a fire bed situated in the center of each vat to keep them warm.
A quarter section of each vat buried in the soil is exposed to the side of the fire bed and four vats can be warmed at the same time.
In my studio, four indigo vats are buried in the soil around a fire bed. The volume of one of the vats is 630 liters while the other three are 500 liters respectively.
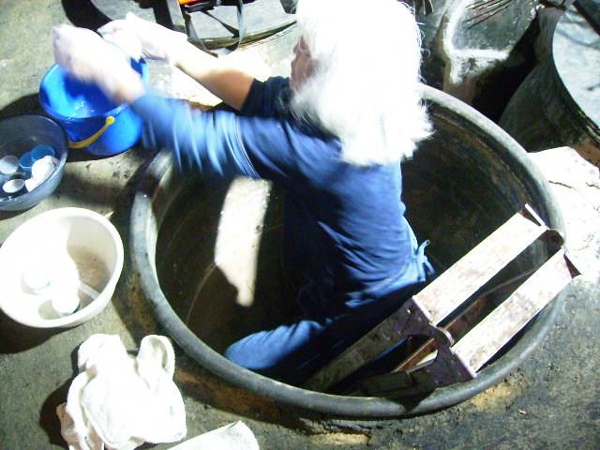 Repair of indigo vats
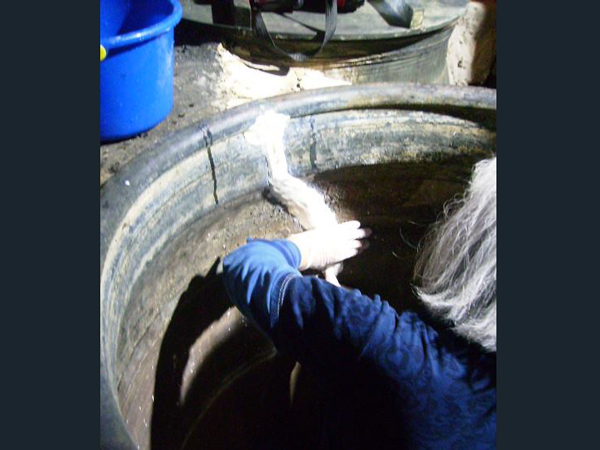 Repair of indigo vats
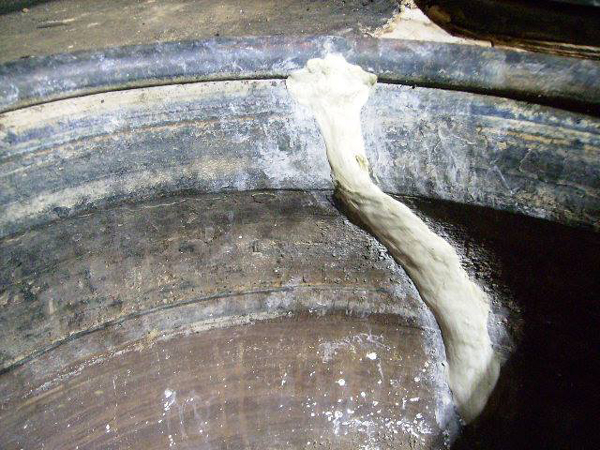 Repair of indigo vats
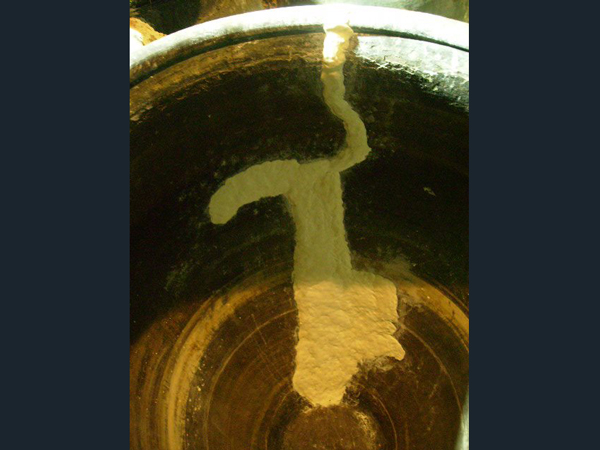 Repair of indigo vats
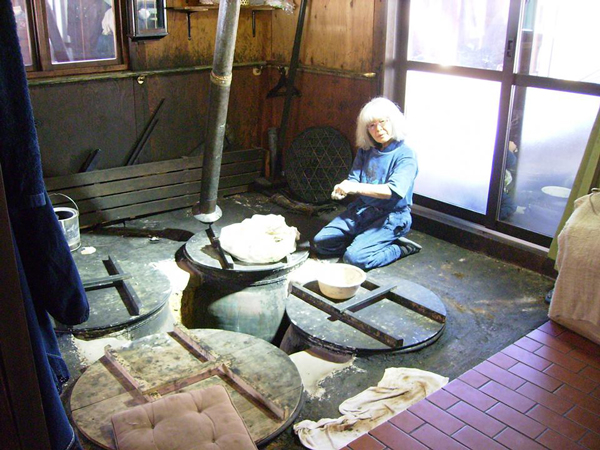 Repair of fire bed
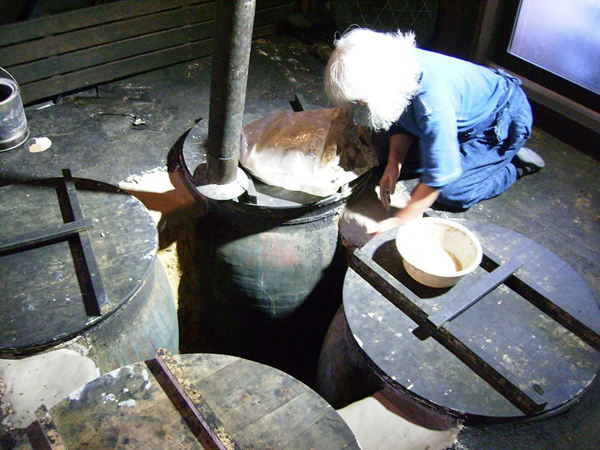 Repair of fire bed
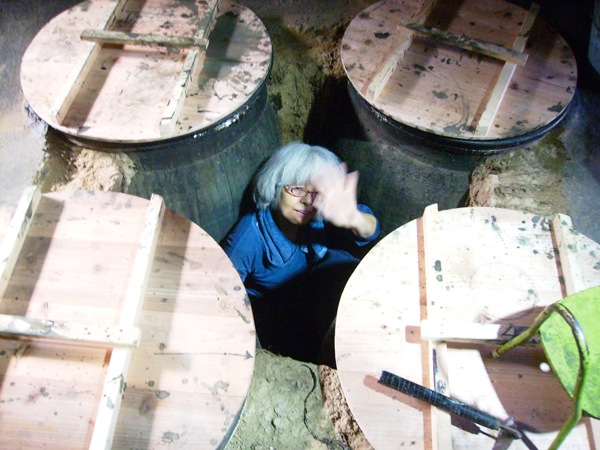 Repair of fire bed
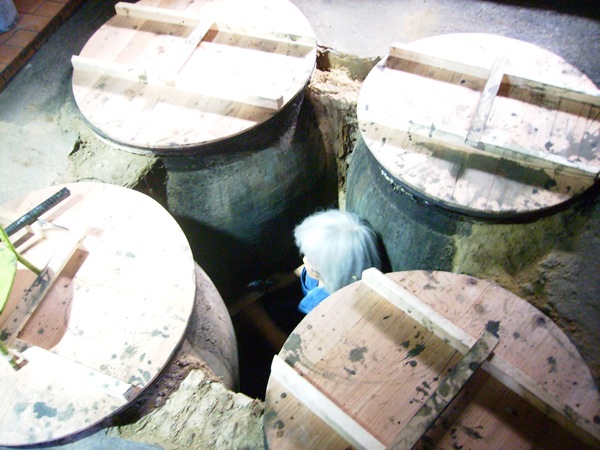 Repair of fire bed
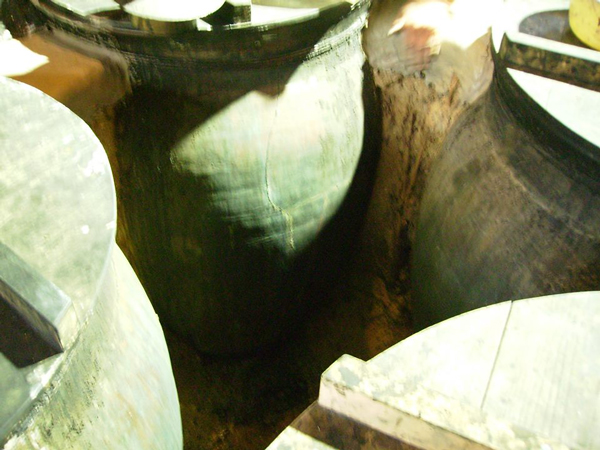 Repair of fire bed
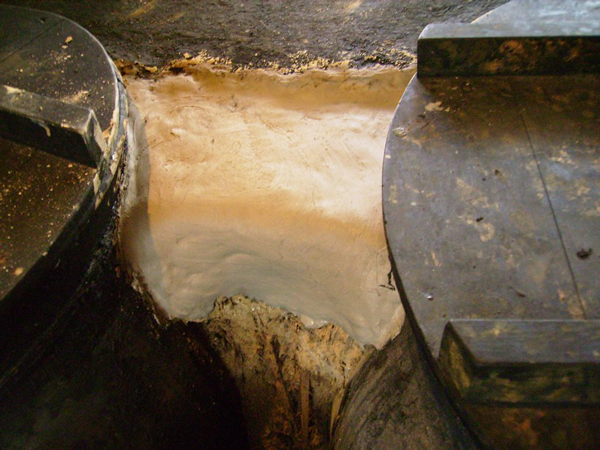 Repair of fire bed
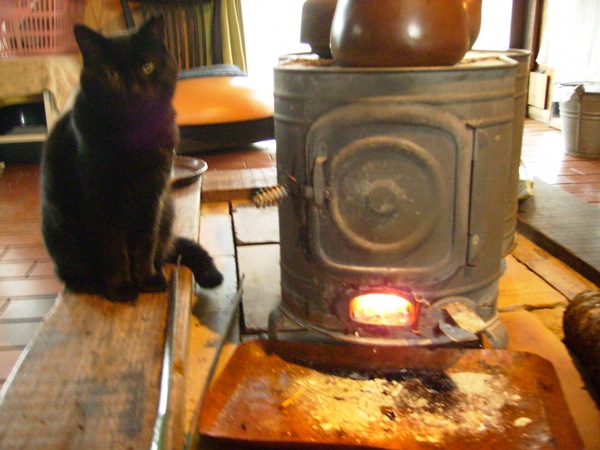
“Wood Stove”
This is a reasonable and convenient wood stove whose design has not been changed since I was born. In old days, we got warm by a wood stove and did all of the kitchen work with it. Now, I use ash that comes out of this wood stove for building indigo.
This is a reasonable and convenient wood stove whose design has not been changed since I was born. In old days, we got warm by a wood stove and did all of the kitchen work with it. Now, I use ash that comes out of this wood stove for building indigo.
Born from the soil and will return to the soil
My lifework lies in the entire process of building indigo
with the wood ash lye fermentation method

